Master the Wind: Your Guide to Upwind Progress in Wing Foiling (and Why a Daggerboard is Your Best Friend)
Blog post descripReady to stop drifting downwind? This comprehensive guide for wing foiling for beginners dives deep into mastering upwind techniques. Explore why a daggerboard is the best wing foil for beginners' training tool, get step-by-step drills, and unlock the skills needed to truly navigate the wind and elevate your 'how to learn wing foiling' journeytion.
BEGINNERS GUIDE'S
7/16/20259 min read
So, you've dipped your toes into the exhilarating world of wing foiling! You've grasped the basics of wing control, you're getting up on the board, and perhaps even experiencing those first magical glides above the water. If you've been following our "How to Learn Wing Foiling: A Beginner’s Guide," you know that the journey from beginner to soaring pro is a thrilling one.
But as you spend more time on the water, you'll quickly discover a crucial skill that separates casual cruisers from confident navigators: going upwind. Imagine effortlessly returning to your starting point after a long downwind ride, or easily getting back to shore if the wind shifts unexpectedly. This is where mastering upwind technique comes in, and for many wing foiling for beginners, a special tool—the daggerboard—becomes an invaluable ally.
The Upwind Challenge for Wing Foiling for Beginners
When you first start how to learn wing foiling, the natural tendency is to be pushed downwind. This happens because the wind is propelling you forward, and without proper technique, you'll simply drift with it. While fun for short runs, constantly drifting downwind means long walks back up the beach, or even worse, getting stranded far from your launch point. This can quickly turn an exciting session into a frustrating chore.
Learning to go upwind is about harnessing the wind's power to move against its general direction. It involves a delicate balance of wing angle, body position, and board trim. It's a skill that, once mastered, unlocks true freedom on the water, allowing you to explore more, extend your sessions, and feel truly in control of your ride. Without it, you're always at the mercy of the wind, limiting your exploration and sometimes even creating safety concerns if you drift too far from shore or designated areas.
Why a Daggerboard is Your Best Wing Foil for Beginners Secret Weapon
In our previous guide, we briefly mentioned using a non-foiling foil board for initial on-water practice, ideally one with a daggerboard. Let's delve deeper into why this simple addition can accelerate your progress, especially when it comes to going upwind.
What is a Daggerboard?
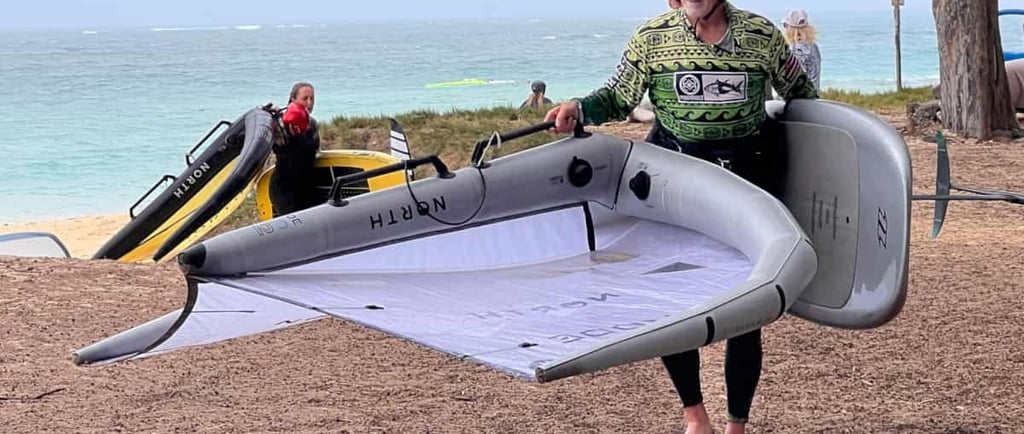
A daggerboard is a removable fin that extends vertically from the bottom of a board, usually through a slot in the middle. Unlike a regular fin, which primarily helps with directional stability and tracking in a straight line, a daggerboard is specifically designed to prevent lateral drift (sideways movement). Think of it like a keel on a sailboat; it provides immense resistance to sideways forces from the wind and water. While most dedicated foil boards for advanced riders don't have them, they are a common feature on many larger, beginner-friendly foil boards and stand-up paddleboards (SUPs) that can be adapted for winging.
How a Daggerboard Helps How to Learn Wing Foiling for Upwind Progression:
Eliminates Sideways Drift: This is the primary and most significant benefit. Without a daggerboard, especially on a wider, more stable beginner wing foil board that isn't yet on foil, you'll find yourself constantly sliding sideways, making it nearly impossible to hold your ground against the wind, let alone move upwind. The daggerboard acts like a deep, fixed rudder, providing essential lateral resistance. It allows the board to "track" through the water rather than slip over it, directly translating the wind's forward energy into forward motion, not just sideways drift.
Focus on Wing Control: Learning wing foiling involves coordinating multiple elements simultaneously: balancing on the board, handling the wing, and managing the foil. By taking care of the sideways drift, the daggerboard simplifies the equation. It allows you to dedicate your full attention to understanding how the wing generates power, how its angle influences your direction, and how to harness the wind efficiently. This focused practice on wing technique is invaluable and will carry over directly when you transition to foiling. You're learning one complex skill at a time, rather than trying to master everything at once.
Foundation for Upwind Angles: With the daggerboard engaged, you can actively experiment with angling the board slightly into the wind. You'll feel the board "bite" into the water, giving you immediate, tangible feedback on how to achieve an upwind trajectory. You'll intuitively learn the sweet spot where you're pointing as much into the wind as possible while still maintaining forward momentum. This muscle memory and understanding of wind angles are crucial for later foiling, as the principles of sailing upwind remain the same, even when you're lifted out of the water.
Safer and Less Frustrating Learning: For wing foiling for beginners, being able to stay close to your launch point dramatically reduces risk and frustration. No more worrying about being swept far downwind or having to endure long, exhausting walks back up the beach. You can spend more time practicing and less time retrieving your gear. This builds confidence, encourages longer sessions, and makes the overall learning experience far more enjoyable. It's about maximizing your effective learning time on the water.
Versatility and Progressive Learning: Many beginner wing foil boards designed to accommodate a daggerboard are often larger, higher-volume SUP-style boards. This means they are incredibly stable for initial learning, even without the daggerboard. You can use them to simply learn to stand up, paddle, and handle the wing. Then, add the daggerboard to master upwind skills and board control. Finally, remove the daggerboard and add the foil once you're ready to lift off. This progressive learning pathway makes the sport far more accessible and less intimidating.
Essential Drills for Mastering Upwind on a Daggerboard Board
These drills are best practiced in light to moderate winds (8-15 knots) on a large SUP or a dedicated beginner wing foil board with a daggerboard. Remember, for these initial upwind drills, keep the foil detached – you're focusing solely on board and wing control to master going upwind.
Drill 1: The "Wing Angle & Body Lean" Drill
Goal: Understand how precise wing angle and subtle body lean affect sideways movement and forward progress upwind. This drill teaches you to "point" the board.
How to:
Start on your knees or standing on your board, holding the wing. Ensure the daggerboard is fully engaged and locked in place.
Sheet in the wing (pull it closer to your body) to generate power.
Begin to angle the front of your board slightly into the wind, maybe 15-20 degrees off a direct downwind course.
Simultaneously, lean your body slightly back and into the wind, shifting your weight onto your heels. This counteracts the sideways push of the wind on the wing and board, allowing the daggerboard to do its job.
Notice how the board tracks straighter and resists drifting downwind. Experiment with small adjustments to your wing angle and body lean.
Gradually practice "pinching" upwind by angling the board further and leaning more, feeling the increasing pressure on the daggerboard. The more you "pinch," the more directly upwind you'll go, but be careful not to point too high into the wind, or you'll stall and lose momentum. Find the balance where you're moving forward but also gaining ground upwind.
Drill 2: The "Figure Eight" Upwind Practice
Goal: Continuously practice upwind sailing in both directions and learn to transition smoothly between upwind tacks. This drill builds endurance and consistency.
How to:
Start by sailing slightly upwind for a short, manageable distance (e.g., 20-30 meters), applying the techniques from Drill 1.
Once you've covered that distance, perform a controlled turn to switch directions. For beginners, a simple tack (turning the nose of the board through the wind) or a jibe (turning the tail of the board through the wind) can be attempted. If these are too complex initially, simply stop, reposition your wing and board, and start sailing upwind in the opposite direction.
Once facing the new direction, immediately resume sailing slightly upwind.
Repeat this process, creating a continuous series of "zig-zags" or a large "figure eight" pattern that progresses steadily upwind. This helps you develop the consistent rhythm and muscle memory needed for sustained upwind sailing. Focus on smooth transitions between each leg.
For future reference and once you're more confident, explore "Mastering the Jibe: Advanced Wing Foiling Techniques" to refine your turns.
Drill 3: The "Stationary Upwind Hold"
Goal: Develop the ability to hold an upwind angle without losing ground, refining your balance and minute adjustments to wind shifts.
How to:
Find a calm spot with consistent wind, ideally where you have some reference points on shore.
Position your board and wing to point as directly upwind as possible without stalling.
Focus intently on maintaining this stationary position relative to the shore. Adjust your wing power (sheeting in or out) and subtle body lean to stay in place, resisting any downwind drift. This is an excellent exercise for fine-tuning your balance, feeling the nuances of the wind, and understanding how small inputs translate to precise control. It builds a deep connection between your body, the wing, and the board.
Transitioning to Foiling with Upwind in Mind
Once you're completely comfortable controlling the wing and consistently going upwind effectively with the daggerboard – essentially, you've mastered the "sailing" part of wing foiling for beginners – it's time to re-introduce the foil. While the foil will lift you out of the water, dramatically reducing drag and changing the sensation of the ride, the fundamental principles of upwind sailing remain the same:
Wing Angle is Still Key: You'll still need to angle your wing slightly into the wind, similar to how you did with the daggerboard. This angle, combined with your speed, is what generates lift and allows you to "sheet in" the wing for forward momentum while still heading into the wind.
Body Lean Becomes More Dynamic: Leaning your body slightly back and into the wind helps counter the wind's force and keeps the board tracking upwind. On the foil, this lean becomes even more critical as it influences the angle of the foil through the water, allowing it to generate side force against the wind.
Foot Pressure for Fine-Tuning: You'll learn to use subtle shifts in foot pressure, particularly on your back foot, to encourage the board to point upwind. This is akin to edging on a snowboard or carving on a ski; you're subtly manipulating the foil's angle of attack to direct the board more efficiently against the wind.
"Pumping" Upwind: As you advance, you'll learn to use subtle pumping motions with the wing and board to generate extra lift and maintain speed while heading upwind. This allows you to "work" the wind more effectively, especially in lighter conditions, to gain precious ground upwind.
Remember, the transition from daggerboard practice to foiling will involve a renewed focus on balance and foil control, but your solid foundation in upwind wing and board management will make this next step significantly smoother.
Why Lessons Still Reign Supreme for How to Learn Wing Foiling
While these drills and insights will give you a solid theoretical and practical foundation, nothing replaces the value of a certified instructor. They provide immediate, personalized feedback that can spot subtle issues in your technique and offer corrections that can save you countless hours of trial and error and potential frustration. An instructor will:
Ensure Proper Technique: They can identify bad habits early on, like poor wing posture or incorrect body lean, which can hinder your progress.
Provide Contextual Understanding: They can explain wind shifts, currents, and safe zones, helping you develop crucial situational awareness.
Accelerate Learning: With direct feedback and tailored exercises, you'll progress much faster than teaching yourself.
Enhance Safety: Instructors prioritize safety, teaching you how to handle challenging situations and avoid hazards.
Finding a beginner-friendly wing foil for beginners school near you is always recommended to accelerate your progress and ensure you learn safely and efficiently. Many schools offer specialized clinics just for upwind sailing once you're comfortable with basic foiling.
FAQs for New Wing Foilers
Here are some answers to common questions about wing foiling for beginners, drawing from popular queries:
What gear do I need to start wing foiling? You'll need an inflatable wing, a foil board (larger and more stable for beginners, potentially with a daggerboard slot), a hydrofoil (large front wing, shorter mast for learning), and essential safety gear like a helmet, impact vest, and board leash. Check out our detailed "Gear Guide" for more specifics!
Is wing foiling hard to learn? Compared to other wind-powered sports like windsurfing or kitesurfing, wing foiling is generally considered easier to learn due to its simplicity (no lines or harness). With proper instruction and consistent practice (especially with daggerboard drills for upwind), most beginners can get up on the foil and make short rides within 5–10 sessions. Mastery, however, comes with time and dedication!
Can I teach myself wing foiling? Yes, it's possible, but it comes with a higher risk of frustration, injury, and developing bad habits. Lessons will significantly shorten your learning curve, ensure you understand critical safety rules, and provide personalized coaching that's invaluable. It's an investment that pays off in faster, safer progression.
How important is learning to go upwind? Extremely important! Without upwind skills, you'll constantly be swept downwind, making it difficult to return to your launch spot, explore new areas, or ride safely in changing conditions. Mastering upwind unlocks true freedom and independence on the water.
What are ideal wind conditions for learning upwind? Start in light to moderate wind (10–15 knots). Too little wind, and you won't generate enough power to move. Too much wind, and it becomes challenging to control the wing and board, especially when trying to maintain an upwind angle. Consistent, steady wind is more important than gusty conditions.
Mastering upwind technique transforms you from a passenger of the wind into its skilled navigator. With consistent practice, these targeted drills, and perhaps the invaluable help of a trusty daggerboard in your initial stages, you'll soon be confidently exploring your favorite spots, returning to shore with ease, and truly embracing the boundless freedom that wing foiling offers. Get out there, practice your angles, and enjoy the ride! What's one upwind challenge you've faced, or hope to overcome, in your wing foiling journey?
Connect
Explore wing foiling schools, vendors, and events.
Support
Learn
801-554-1050
© 2025. All rights reserved.